Motivation
Suppose you work on ASP.NET Core web application that solves some business-related tasks. You know, a few forms where users enter their data and get some reports. Although such a project may not require any complex logic on the client, you still probably need to write some JavaScript code to make user interaction with your application more convenient and enjoyable. For example, you may need a simple prompt popup on item deletion since it's not quite right to use a separate page for that. Or, you want to do client-side validation. Or ... it really can be any other client-side task, you name it.
Of course, you can add a few lines of script on each page (with vanilla JavaScript or using the good old JQuery) but it is really hard to maintain all these small pieces when your project gets bigger. Moreover, some of these pieces do the same things, so you either need to replicate them in many places (bad decision) or you end up creating a small library that contains all client-side functions, structures, and classes used in your project.
This article describes how to create such a JS library for your ASP.NET Core project with minimal effort and in a way that will provide better support for further changes.
Solution
Long story short, we are going to put all our client-side code to separate files (with classes, functions, data structures) and then bundle them with the help of WebPack 5. The resulting script can be included right into your _Layout.cshtml (so, it will be available on all pages of your web app) or you can include it only on the pages where it's necessary.
Moreover, we will use TypeScript instead of pure JavaScript because, you know, static typing is good and it allows us to catch a lot of errors at compile time.
In addition, you can consider this article as a quick introduction to client-side development. Especially if you are a .NET developer who still tends to stay backend-only and who is afraid of all that fancy client-side stuff (as I was some time ago).
Getting started
Here we will describe the steps necessary to set up the configuration for bundling a small TypeScript library with your own code. For the sake of simplification, this library will contain just one function for now.
0. Install Node.JS
I'm pretty much sure you already have it installed. In case you don't - please do it. We will need Node.JS version 10.13.0 (or newer) on your dev/build machine.
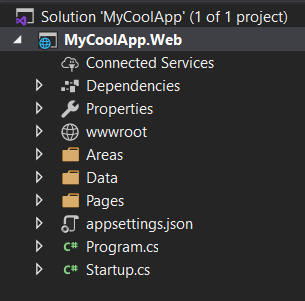
1. ClientScript sub-folder
We will put all our scripts and configuration files into a separate sub-folder ClientScript of your main project's folder. It's similar to ClientApp sub-folder used in most of the SPA (single page application) templates available for ASP.NET Core.
2. Add configuration files
We will need 3 configuration files:
- package.json - to define our bundle and all dependencies,
- webpack.config.js - for WebPack configuration
- tsconfig.json - for TypeScript settings.
For now, you can just copy these files as-is. We will describe each of them later.
{
  "name": "myapp-client-bundle",
  "version": "1.0.0",
  "description": "This is client-side scripts bundle for MyApp",
  "private": true,
  "scripts": {
    "build": "webpack --mode=development",
    "build:prod": "webpack --mode=production"
  },
  "devDependencies": {
    "ts-loader": "^9.2.5",
    "typescript": "^4.4.3",
    "webpack": "^5.52.1",
    "webpack-cli": "^4.8.0"
  },
  "dependencies": {
  }
}
const path = require('path');

module.exports = {
  entry: './src/index.ts',
  module: {
    rules: [
      {
        test: /\.tsx?$/,
        use: 'ts-loader',
        exclude: /node_modules/,
      },
    ],
  },
  resolve: {
    extensions: ['.tsx', '.ts', '.js'],
  },
  output: {
    library: {
      name: 'MYAPP',
      type: 'var'
    },
    filename: 'app-client.js',
    path: path.resolve(__dirname, '../wwwroot/js'),
  }
};
{
  "compilerOptions": {
    "outDir": "./dist/",
    "noImplicitAny": true,
    "module": "es6",
    "target": "es5",
    "allowJs": true,
    "moduleResolution": "node"
  }
}
3. Add TypeScript files
For the sake of simplicity, our library in this initial stage will contain only one function hello() that simply prints Hello world to the browser's console. Here are two files we need for that outstanding :) functionality:
hello.ts
This file contains our function packed into the funcs namespace, so we will be able to call it as MYAPP.funcs.hello()
export namespace funcs {
    export function hello(): void {
        const message = 'Hello world!';
        console.log(message);
    }
}
index.ts
This is our entry point. This TypeScript file will not contain any functions or classes. It will just define which parts of our code (functions, interfaces, classes, etc) we are going to expose to the outside world. Since we have only one file with "real" functionality our index.ts will as simple as:
export * from './hello';
and it means that we would to "reveal" all public (exported) parts inside our hello.ts
4. Build your library
That's it. We are ready to build our bundle script. To do so, open your terminal program, move to ClientScript folder and run the following 2 commands:
npm install
and then
npm run build
The first one will install all necessary NPM libraries (the ones which are listed in the dependencies and devDependencies sections of your package.json). You will need to run it before the first build and then only when you add a new dependency (another NPM package) to your package.json.
The second command actually runs WebPack that compiles (or, to be more correct, "transpiles") your TypeScript files to JavaScript, then bundles all JS code into one file app-client.js and puts that file into wwwroot/js folder of your web project as defined in webpack.config.js configuration file.
According to the output/library section of that file, all functions or structures of your new bundle will be accessible via the MYAPP global variable.
5. Attach the final script to your app
To use our script you just need to include it on your page as any other JS file:
<script src="/js/app-client.min.js"></script>
You can add that line either to the _Layout.cshtml (to make it available on all pages of your web application) or to the view or Razor page where it's necessary.
Now you can call the function(s) from our new JS library:
<script>
MYAPP.funcs.hello();
</script>
Configuring the scope
One of the great features of using TypeScript and WebPack is organizing your code in modules and then combining those modules into namespaces using WebPack's configuration and TypeScript's namespace structure.
There are several possible options.
1. Use module names and their aliases
You can put functions and classes in a module and export that module either "as-is" or with an alias.
For example, if we have the following module:
export class Dialog {
    ...
}

export function showDialog() {
    ...
}
and we use this export declaration in our index.ts:
export * from './dialogs';
then our Dialog class and showDialog() function will be available right under MYAPP namespace as MYAPP.Dialog and MYAPP.showDialog().
You can also specify an alias for that dialogs module:
export * as dlg from './dialogs';
Now our class and the function will be accessible as MYAPP.dlg.Dialog and MYAPP.dlg.showDialog() correspondingly.
2. Using namespace clause
You can also use the namespace clause and then re-export the imported modules, so all functions, variables, and types that belong to the same namespace even in different modules will be merged together.
For example, we have the following two modules:
export namespace ui {
    export class Dialog1 {
        ...
    }

    export function showDialog1() {
        ...
    }
}
and
export namespace ui {
  export class Widget1 { ... }

  export function renderWidget1() { ... }
}
w, if we place the following two lines in our index.ts module:
export * from './dialogs';
export * from './widgets';
we will be able to access all those exported functions and classes under the MYAPP.ui namespace. For example: MYAPP.ui.renderWidget1().
Using third-party libraries
Maybe the most significant advantage of this setup (that may seem a little complicated for just a "hello world" function) is the possibility to use any third-party JS library from hundred of thousands available on NPM repository.
As an example, we slightly modify our hello() function so that it will take a parameter name and will print the phrase Hello, {name} to the console. Before printing, the string stored in the name variable will be capitalized with the help of capitalize() function from the well-known lodash library.
Here are the steps we should take to achieve this goal:
1. Add lodash library to your package.json
Just open a terminal inside your ClientScript folder and type:
npm install lodash
As the result of this operation, you will see something like the following in the dependencies section of your package.json file:
"dependencies": {
    "lodash": "^4.17.21"
}
(the actual version number can be different).
2. Import lodash functions in your hello.ts file
Add the following line at the beginning of hello.ts:
import * as _ from 'lodash';
3. Modify hello() function
Now we can use all lodash library functions using _ global variable (this is the default way of using lodash functions since the times it was not an NPM library). So, our hello function will look the following:
export function hello(name : string): void {
  const message = 'Hello, ' + _.capitalize(name);
  console.log(message);
}
Additionally, we will modify the function call on our page:
<script>
MYAPP.funcs.hello('sergiy');
</script>
When we rebuild our script (npm run build), run the app, and open the main page, we will see the following string in the console panel of our browser:
Hello, Sergiy
Watch mode
It's unnecessary to run the build command each time you change something in your script or add a new package to your project. Instead, you can use the watch mode once, and WebPack will re-build your project every time something was changed:
npm run watch
Conclusions
As we can see, using TypeScript with WebPack to build vanilla JS client-side scripts for your ASP.NET Core projects has a lot of benefits:
- Strong-typed TypeScript code with all advantages of the latest JavaScript features: classes, arrow functions, modules, scopes, and promises.
- Better support by code editors (like Visual Studio Code) with syntax highlighting, IntelliSense, etc.
- A possibility to use 3-party libraries with typing definitions.
- More compact and optimized JS 5 code generated by WebPack.
- Hot reload of the changes you make in the code editor.
- Better debugging experience (I'm going to write a separate article about it). It's possible to debug your original TypeScript code instead of minimized JS code available for your web app.
There is one more note. We used WebPack in this article since it's the most popular module bundler for now. However, I believe that we can quickly get the same results with any other bundler like Browserify, Parcel, or Rollup.
Please let me know (via my Twitter account @korzhs or here in the comments) if this article was valuable and informative for you.
Happy coding!
]]>